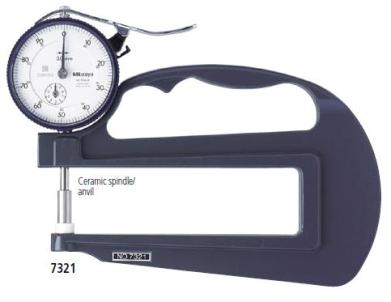
THICKNESS GAUGES
Code: 13009-00
Description: Thickness Gages series 547, 7,Thickness Gages offer a quick and efficient means of inspection with their convenient grip handle, thumb trigger and springloaded spindle.The various models cover a wide range of applications.
feature
• Wide range of applications with various types of measuring faces (on the spindle and anvil).
• The digital models incorporate Mitutoyo's popular ID-C and ID-S Series Digimatic Indicators to provide error-free LCD readings as well as data output for SPC analysis.
• 547-401 (547-400S) is ideally suited for measuring thicknesses of paper, film, wire, sheet
metal and similar materials. Technical Data of Digital Models Accuracy: Refer to the list of specifications
Resolution:
0.01mm type 0.01mm
0.001mm type 0.001mm/0.001mm
.0005”/0.01mm type . 0005”/0.01mm
.00005”/0.001mm type . 0005”/.0001”/.00005”/
0.01mm/0.001mm
Display: LCD
Scale type: ABSOLUTE electrostatic linear encoder
Max. response speed: Unlimited
Measuring force: Refer to the list of specifications
Stem dia.: 8mm (ISO/JIS type) or 3/8” (ANSI/AGD type)
Battery: SR44 (1 pc.), 938882
Battery life: Approx. 7,000 hours under normal use
Dust/Water protection level: IP42 or IP53 (dust-proof type)
Optional Accessories
905338: SPC cable (1m) for digital models
905409: SPC cable (2m) for digital models
02AZD790F: SPC cable for U-WAVE (160mm)
902011: Spindle lifting lever (ISO/JIS type)*
902794: Spindle lifting lever (ANSI/AGD type)*
137693: Spindle lifting hook**
540774: Spindle lifting cable
125317: Spare rubber boot (for dust-proof type)
02ACA571: Auxiliary spindle spring for 25mm/1”
models***
02ACA773: Auxiliary spindle spring for 50mm/2”
models***
––––––: Backs (See page F-40.)
––––––: Contact points (See page F-36.)
*Can be used on 12mm/.5” models only.
**Can be used on 25mm/1” or 50mm/2” models.
***Required when orienting the indicator upside down.


